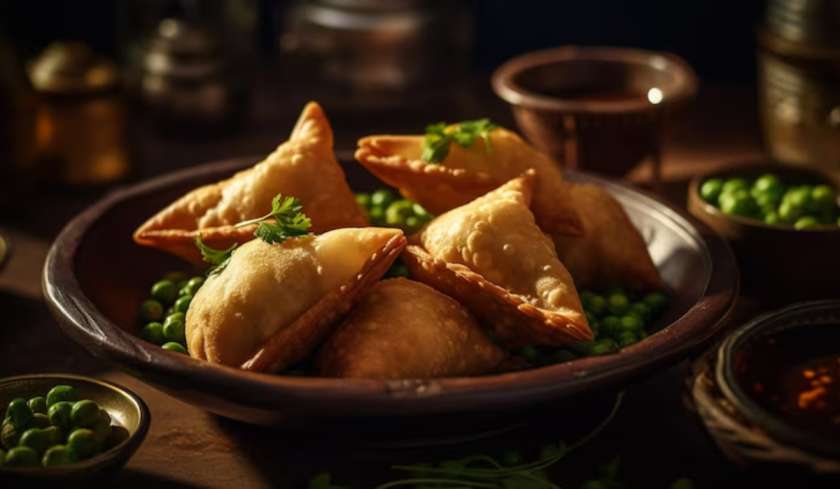
Samosa is a popular Indian snack loved by people of all ages. The samosa recipe with potato filling is simple, top notch, and idealize for tea time, parties, or celebrations. New on the exterior and delicate on the insides, these samosas are filled with spiced squashed potatoes that make each snack delightful. Making potato-filled samosas at household is straightforward with essential fixings like flour, potatoes, and flavors. This step-by-step equation will coordinate you to make come full circle, golden-brown samosas that everyone will appreciate.
What is a Samosa?
It is a small prepared great box that is stuffed with something extraordinary. Here we ought to stuff it with a spiced potato stuff. Here is the ordinary potato samosa. It is a snack equation that is exceptionally predominant among Indians. People eat them at parties or in evening tea, or they basically eat them when they feel hungry. The most honorable thing is the juxtaposition of surfaces the really crunchy exterior and the warm, sensitive interior.
What You Need for Your Samosa Recipe
Before we start folding, we require to get our bunch of fixings arranged. We will portion this into two parts: one for the new outside shell (the blend) and one for the delightful insides (the filling).
For the Samosa Dough (The Crispy Shell)
- 2 mugs of all-purpose flour (maida)
- 4 tablespoons of oil or broken down ghee
- 1/2 teaspoon of salt
- About 1/2 glass of water, little by little
For the Potato Samosa Filling
- 3 large potatoes, boiled and peeled
- 1 tablespoon of oil
- 1 teaspoon of cumin seeds
- 1 tablespoon of ginger, finely chopped
- 1-2 green chilies, finely chopped (utilize less if you do not like spice)
- 1/2 holder of green peas (unused or frozen)
- 1 teaspoon of coriander powder
- 1/2 teaspoon of garam masala
- 1/2 teaspoon of amchur (dry mango) powder or a smash of lemon juice
- Salt to taste
- Fresh coriander takes off, chopped
Other Things You Will Need
- Oil for significant frying
- A little bowl of water (this will be our "glue")
Let's Make the Hitter for the Shell
This step is outstandingly crucial for a new samosa. A incredible blend makes all the difference.
- Mix Dry Stuff: In a tremendous bowl, take your 2 mugs of flour and incorporate the 1/2 teaspoon of salt. Mix it around.
- Add the Oil: By and by, incorporate the 4 tablespoons of oil or ghee. Utilize your fingers to mix it with the flour. Rub it between your palms until the flour feels a bit like breadcrumbs. This is the puzzle to a flaky, new crust!
- Add Water: By and by, incorporate water little by little. Start with a few tablespoons and mix. Keep counting a little water and mixing until the flour comes together to shape a firm blend. Do not make it as well fragile. It should to be firm.
- Knead and Rest: Control the hitter on a clean surface for 4-5 minutes until it is smooth. At that point, put a little oil on the blend ball, cover it with a clammy cloth, and let it rest for 30 minutes. This makes a contrast the hitter loosen up and gotten to be easier to roll.
How to Make the Best Samosa Filling Recipe
While the player is taking a rest, let's make the star of the show up – the potato filling.
- Add Aromatics: Directly, incorporate the chopped ginger and green chilies. Blend for nearly a little until you can fragrance their uncommon fragrance.
- Add Cumin Seeds: When the oil is hot, incorporate the cumin seeds. Let them sizzle for a few seconds.
- Heat the Pan: Warm 1 tablespoon of oil in a dish on medium heat.
- Mash the Potatoes: Take your bubbled potatoes and squash them by and large in a bowl. You do not require a smooth stick; a few small ties are extraordinary for texture.
- Cook the Peas: Incorporate the green peas and cook for 2-3 minutes if they are modern. If they are set, cook for reasonable a minute.
- Spice it Up! Directly, turn the warm to moo. Incorporate the coriander powder, garam masala, amchur powder, and salt. Mix quickly for reasonable 10 seconds. Be cautious not to burn the spices.
- Mix with Potatoes: Incorporate the squashed potatoes to the holder. Mix everything really well so the flavors coat all the potato.
- Finish with Herbs: Turn off the warm and mix in the unused coriander leaves.
- Let it Cool: Take the filling out of the skillet and let it cool down completely a few time as of late we start filling the samosas.
The Fun Part: Shaping and Filling the Samosas
This might show up questionable, but it's like learning to overlay a paper watercraft. You'll get the hang of it!
- Divide the Dough: After 30 minutes, your blend is arranged. Control it for one more little. At that point, segment it into equal-sized small balls. Around 6-7 balls is good.
- Roll the Dough: Take one ball and roll it into a circle that's not as well incline and not as well thick. It should to be around 6 inches across.
- Cut in Half: Take a cut and cut the circle right down the center, so you have two half-moons.
- Make the Cone: Take one half-moon. Put a little water along the straight edge. Directly, bring the two corners of the straight edge together and press to shape a cone shape. The watered edge will act as adhere and follow together.
- Fill the Cone: Hold the cone in your hand. Directly, fill it with the potato filling. Do not stuff it, or it might break open though frying.
- Seal the Samosa: Once filled, put a little water on the insides open edge of the cone. By and by, press the edges together to seal the samosa closed. You should to by and by have a come full circle triangle shape! Do this with all the blend balls.
Frying Your Homemade Samosas to Perfection
We are about there! The final step is to make them brilliant and crispy.
- Heat the Oil: Take a significant holder and pour in adequate oil for significant burning. Warm it on a medium fire. To check if the oil is arranged, drop a small piece of blend into it. If it sizzles and comes up continuously, the oil is come full circle. If it burns right truant, the oil is as well hot.
- Fry on Low: Once the oil is arranged, gently slide in a few samosas. Do not swarm the holder. The key to a super firm samosa is to burn them on a moo to medium warm. This cooks the blend from the insides without burning the outside.
- Be Patient: Let the samosas burn steadily. You will see them slowly changing color. Keep turning them by and by and at that point so they get similarly brilliant brown all over. This should to take roughly 10-12 minutes.
- Drain: When they are a beautiful brilliant brown, take them out with a opened spoon and put them on a plate lined with paper towels. This soaks up the extra oil.
Tips for the Perfect Samosa Every Time
- Stiff Dough: A fragile player will absorb more oil. A firm hitter is the secret to a non-oily, new shell.
- Cool Filling: Ceaselessly let the filling cool down. A hot filling will make the hitter soaked and troublesome to work with.
- Seal Tight: Make past any question you seal the edges genuinely well with water, so the samosas do not open up in the hot oil.
- Low Heat Frying: This is the most basic tip. Burning on moo warm makes the samosas super crispy.
Conclusion
Samosa recipe with potato filling at residential is fundamental, fun, and fulfilling. With principal fixings like flour, potatoes, and flavors, anybody can get arranged this firm and delightful nibble. Taking after the steps carefully guarantees golden-brown, faultlessly molded samosas each time. They are come full circle for tea time, parties, or celebrations.
FAQs About Your Samosa Recipe
1. Can I bake samosas instead of frying them?
Yes, you can! In organize to plan them, all you require is an oil brush and a preheated broiler at 350 F (180 C) and get ready your samosas until they are brilliant and firm; roughly 30-40 minutes. They will not be as flaky as fricasseed ones but will be uncommonly tasty.
2. How do I store additional samosas?
You can keep remaining samosas in an discuss verification holder in the ice chest for 3-4 days. You can besides set them for a month. To warm, warm them in an broiler or an examine fryer to get the crispiness back. Do not utilize a microwave, as it will make them soft.
3. Can I change the potato samosa filling?
Of course! This is a reasonable a classic course of action of samosa filling. You may as well join other things that you like, like the small bits of paneer, corn, or in fact cooked minced meat. Get creative!
4. My samosas are not crispy. What did I do wrong?
This routinely happens when the blend was as well fragile, the oil was not hot adequate or when you fricasseed them at a tall temperature.